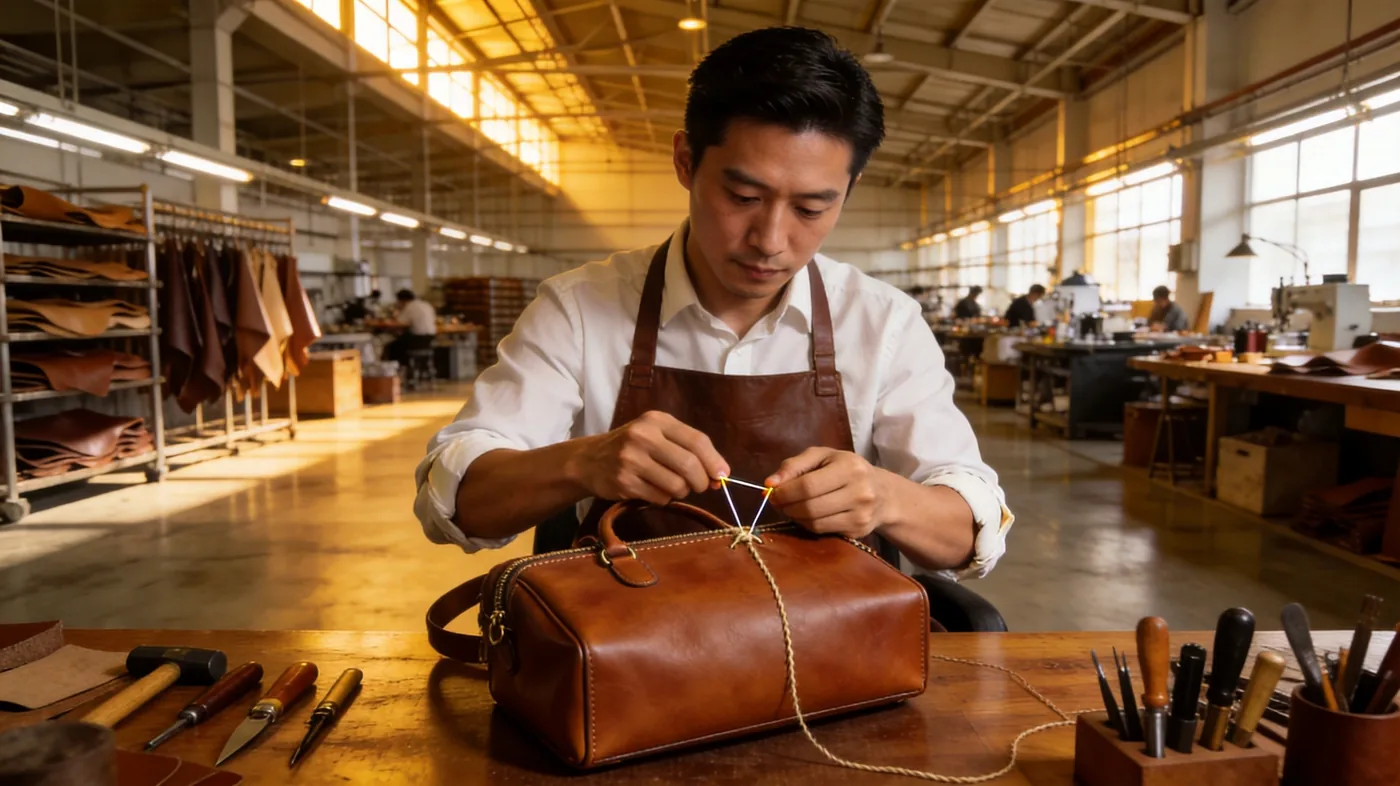
Leather craftsmanship separates luxury from mass production through five techniques: a hand-sewn saddle stitch on structural seams, edge finishing that seals the fibre rather than covering it, skiving and creasing that remove bulk at every join, branding pressed into the hide rather than printed onto it, and hardware set through reinforced plies. Everything else — leather grade, lining, silhouette, hardware finish — is downstream of these five. A bag that fails on all five is a mass-produced bag regardless of what the hide cost. This guide defines each technique, gives the measurable specification behind it (stitch density in SPI, edge coat counts, skive depths, foil temperature bands), and sets out how to verify every one of them on a physical sample before you release bulk.
The document is written for brand and sourcing teams who must specify, cost and approve leather craftsmanship rather than simply admire it. Each technique below carries a number, because a technique that cannot be measured cannot be held to contract, and a craftsmanship claim that is not written into the specification will not survive a production floor under time pressure. Where a figure is cited as an industry estimate, it reflects a range that trade sources commonly quote rather than a standardised measurement you should expect two suppliers to reproduce identically.
Which Techniques Separate Luxury from Mass Production
The direct answer: five techniques, and only five, reliably separate a luxury leather bag from a mass-produced one. They are the saddle stitch (or, on non-structural seams, a high-density machine lock stitch); edge finishing that seals rather than paints over; skiving and creasing that remove bulk and set the stitch line; branding cut or pressed into the grain; and hardware set through reinforcement with washers and backing plates rather than into a single thickness. Two of the five are visible within three seconds of picking a bag up — the stitch and the edge. Three are felt rather than seen.
| Technique | Mass-production default | Luxury specification | How to verify on a sample |
|---|---|---|---|
| Stitching | Single-needle lock stitch, 6-8 SPI, polyester thread | Hand saddle stitch at 7-9 SPI on structural seams, waxed linen or bonded nylon | Examine an untrimmed seam end: a saddle stitch shows two independent thread runs, a lock stitch shows one interlocked run |
| Edge finishing | One coat of edge ink, or a raw edge concealed under lining | Three to five coats of edge paint, sanded between coats; or multi-pass burnishing with gum tragacanth and beeswax | Rub the edge with a white cloth: a finished edge neither transfers colour nor sheds fibre |
| Skiving and bulk control | Full substance carried through joins; folds simply compressed | Joins skived to 0.6-0.8 mm; corners and turn-ins thinned before folding | Run a finger across a folded corner: a skived corner lies flat and parallel to the panel |
| Creasing and stitch setting | Stitch line sewn flat, no crease, no set | Creasing iron run along a marked line; seam set with a bone folder after sewing | View the seam under raking light: a creased and set seam sits in a single plane |
| Branding | Printed, transfer-applied or laser-marked logo | Deboss, emboss or hot-stamped foil pressed into the grain with matched tooling | Tilt the panel: a pressed mark catches light on its shoulders, a print does not |
| Hardware | Rivet set into a single leather thickness | Rivet or post set through two plies with a backing washer and 0.3-0.5 mm clearance | Attempt to rotate the fitting with thumb pressure: a correctly set fitting does not move |
A brand that specifies only the two visible markers will pass a photographic inspection and fail a customer. The stitch and the edge sell the bag; the skiving, creasing and hardware setting determine whether it is still in service in five years. That is why the specification document matters more than the mood board, and why the sample approval meeting should include a tolerance for each of the five rather than a general instruction to "make it feel premium".
Programme parameters at a glance
| Parameter | Commitment |
|---|---|
| Minimum order quantity | 500 pieces per style / colourway |
| Sampling lead time | 6–10 working days (12–15 days for complex constructions) |
| Bulk production lead time | 35–50 days after sample approval |
| Inspection standard | AQL 2.5 (ISO 2859-1), single sampling, general level II |
| Incoterms | FOB Xiamen — EXW, CIF and DDP available on request |
| Payment terms | T/T 30% deposit / 70% before shipment; L/C at sight for container loads |
| Verified production floor space | 4,950 m² (SGS-verified) |
| Team | 137 staff across 7 production lines |
| Equipment | 149 machines including computerised saddle-stitch and edge-painting units |
| Monthly capacity | 200,000 pieces |
| Entity | Founded 2014; principal has worked in bag development since 2004 |
Stitching Methods Compared
Three stitch constructions account for effectively all leather bag assembly: the hand saddle stitch, the machine lock stitch and the machine chain stitch. They differ in how the thread is locked, and that single difference determines what happens when a thread breaks, how the seam behaves under sustained load, and how the seam reads at arm's length.
A lock stitch passes a needle thread through the material and interlocks it with a bobbin thread beneath. The lock sits at the midpoint of the material thickness. Cut one stitch and the lock at that point releases; tension redistributes to neighbouring stitches and, under load, the failure can propagate along the seam. A chain stitch loops a single thread through itself, which is fast and tolerant of stretch but unravels readily from any free end. A saddle stitch uses two needles on one length of waxed thread, passed through each hole from opposite sides in sequence, so every stitch is an independent lock. Break one and the stitches either side of it continue to carry the load.
| Attribute | Hand saddle stitch | Machine lock stitch | Machine chain stitch |
|---|---|---|---|
| Construction | Two needles on one waxed thread, crossed inside every hole | Needle thread interlocked with a bobbin thread | Single thread looped through itself |
| Typical SPI on leather | 7-9 SPI (18-23 stitches per 10 cm) | 6-10 SPI, line-dependent | 5-8 SPI; rare on leather bags |
| Thread | Waxed linen, waxed polyester or bonded nylon in the 20s-40s count | Bonded nylon or polyester, 30s-40s | Polyester filament |
| Tensile behaviour | Each stitch independent; load distributed evenly along the seam | Load shared, but a break redistributes tension to immediate neighbours | Load carried by loop integrity; stretch is highest of the three |
| Failure mode | Abrades gradually; the seam remains closed until several adjacent stitches fail | Can run from a single break when the seam is under load | Unravels from a free end; must be back-tacked to hold |
| Appearance | Slightly angled, irregular crown with depth and shadow | Flat, even, parallel top thread | Flat on the face, looped on the underside |
| Speed | Roughly 40-60 stitches per minute by hand | Several hundred stitches per minute | Fastest of the three constructions |
| Where it belongs | Structural seams, handles, gussets, base corners, stress points | Long straight runs, linings, non-load-bearing seams | Knit hems and temporary basting; rarely appropriate for leather |
| Cost implication | Materially higher labour; priced per seam rather than per bag | Lowest labour cost per metre of seam | Lowest, but the highest rework risk on leather |
Why the Saddle Stitch Holds
The mechanical advantage is straightforward once you look at a cross-section. In a saddle stitch, both threads pass through the same hole in opposite directions and cross inside it, so the leather itself forms part of the lock. Friction between the two waxed runs, and between the thread and the fibre of the hide, holds each stitch in place independently of its neighbours. A broken stitch therefore becomes a local cosmetic defect rather than a structural event. In a lock stitch, by contrast, the interlock is formed between the two threads at a single point, and the integrity of the seam depends on the continuity of both threads along its whole length.
Where Machine Stitching Is the Right Call
Machine stitching is not a compromise in every position. It is faster, more consistent over long runs, and entirely appropriate where the seam carries little or no load. Specifying hand stitching everywhere inflates cost without improving performance, and it can even work against the design: a machine lock stitch lies flatter than a hand stitch and reads more cleanly on a minimal, unlined silhouette.
- Use machine lock stitch for lining assembly, interior pockets, long non-structural top-lines, zip tapes, and any seam that is fully enclosed and protected from abrasion.
- Use hand saddle stitch for handle-to-body joins, gusset corners, base seams, strap attachment points, D-ring tabs, and any seam that will be pulled, twisted or loaded repeatedly.
- Consider a hybrid specification where a bag is machine-assembled and then hand-finished: structural seams saddled, cosmetic seams machined. This is the most common structure in the premium tier and the easiest to cost.
- Match thread to the failure mode you expect. Waxed linen abrades slowly and looks traditional; bonded nylon resists moisture and mildew better in humid markets.

Stitch Density: What the Numbers Mean
Stitch density is expressed as SPI, stitches per inch, counted along the seam. It is the single most quotable number in a craftsmanship specification, and the most commonly abused. Higher is not automatically better: density interacts with leather substance, thread diameter and hole spacing, and pushing SPI too far on a soft hide produces a perforated seam that tears like a postage stamp.
| SPI range | Stitches per 10 cm | Typical application | Reading |
|---|---|---|---|
| 4-5 SPI | 16-20 | Heavy bridle leather, luggage, belting, harness work | Deliberately coarse on thick, firm hides; a low count here signals confidence, not economy |
| 6-7 SPI | 24-28 | Standard production grade on 1.2-1.4 mm bovine | The industry workhorse. Acceptable on non-structural seams; unremarkable on handles |
| 7-9 SPI | 28-35 | Premium hand-sewn structural seams | The target band for saddle-stitched handles and gussets on full-grain leather |
| 9-11 SPI | 35-43 | Fine calfskin, small leather goods, watch straps | Appropriate on thin, firm leather; risky on anything soft or loosely fibred |
| 12+ SPI | 47+ | Couture and show pieces | Reads as luxury in photographs, but materially weakens most bag leathers; avoid on load-bearing seams |
The correct way to write density into a specification is to bind it to the seam rather than to the bag. A single figure such as "8 SPI throughout" is easy to write and impossible to meet, because the handle join, the lining top-line and the zip tape all want different values. Specify per seam position, and specify a tolerance — typically plus or minus one stitch per inch — because demanding an exact count invites falsified samples rather than better bags.
- Count, do not estimate. Lay a rule along 25 mm of seam and count the crowns. Do this at three positions on each seam and on two units of the same sample.
- Check consistency at corners. Density almost always drifts where a seam turns. A seam that reads 8 SPI on the straight and 5 SPI around a gusset corner has been rushed, and the corner is where it will fail.
- Watch the hole, not just the stitch. Awl or pricking iron spacing is fixed; a seam that is denser than its hole spacing means the holes have been opened up, which weakens the leather.
- Confirm the thread diameter matches the hole. Oversized thread in small holes abrades; undersized thread in large holes leaves visible gaps.
- Verify back-tacking at terminations. Machine seams should be back-tacked or the thread ends sealed; a saddle stitch should finish with the thread ends buried and locked, not simply cut.
Edge Finishing Techniques
The edge is where a leather bag fails first. It is the only part of the construction where the fibrous core of the hide is exposed to air, moisture and abrasion, and it is the part a customer touches most often. There are four established ways to treat it, and the choice determines both the price band and the service life of the bag.
| Method | Process | Where it is used | Durability | Failure signs |
|---|---|---|---|---|
| Burnished (slicked) edge | Edge is bevelled, sanded through progressively finer grits, dampened, then slicked with gum tragacanth, beeswax or a proprietary dressing and rubbed with a wood or canvas slicker until the fibres lay down and polish | Vegetable-tanned leather, bridle work, heritage and unstructured silhouettes | High, and repairable in service; improves with handling | Fuzzing and fibre lift after moisture exposure; a grey, dull edge that no longer takes a polish |
| Painted edge | Edge is sanded flat, then two to five coats of water- or solvent-based edge paint are applied, with intermediate sanding, and sometimes a final wax top-coat | Chrome-tanned and corrected-grain leathers, contemporary structured bags, most branded programmes | High when correctly applied; a poor coat system cracks rather than wears | Cracking along the fold, peeling away from the grain, colour transfer onto light clothing |
| Folded (turned) edge | Leather is skived at the return, folded back on itself and either glued, stitched or both, so no raw core is exposed | Unlined interiors, lightweight totes, soft calfskin constructions | Very high; there is no exposed fibre to fail | Crease splitting at the fold line, adhesive bleed, uneven fold width |
| Piped or bound edge | A separate strip of leather, or a textile binding, is folded over the raw edge and stitched through, enclosing it | Travel pieces, luggage, bags that will be checked, racked or abraded | Highest of the four; the binding takes the wear instead of the panel | Binding separation at corners, stitch abrasion where the binding meets the body |
Edge paint is a system, not a product. The visible failures — cracking at the fold, peeling away from the grain, colour transfer — are almost never caused by the paint itself. They come from insufficient sanding between coats, a coat applied too thickly, a substrate that was not de-greased, or a paint system whose flexibility does not match the leather it sits on. A specification should therefore name the coat count, the intermediate sanding grit, and the flexibility class of the paint, not merely a colour reference.
- Burnishing requires the right tannage. Vegetable-tanned leather burnishes well because it is dense and damp-responsive. Chrome-tanned leather generally does not, which is why painted edges dominate contemporary production.
- Painted edges need cure time. A sample painted the day before it ships will pass a visual check and fail in transit. Build cure time into the sampling schedule as a defined step.
- Folding needs skiving first. A fold made through full substance produces a bulky, springy return that will not hold its line; the return must be thinned to roughly half the original substance.
- Binding adds a seam. It is the strongest edge treatment and the most expensive, because it introduces an additional operation, an additional material and an additional inspection point.
Skiving, Creasing and Structural Prep
Most of what a customer perceives as quality is decided before a needle is threaded. Skiving, creasing, splitting and reinforcement are the invisible operations that determine whether a bag lies flat, whether a handle sits comfortably, and whether a seam survives its second year. They are also the operations most easily cut when a production schedule tightens, which is exactly why they belong in the specification.
- Skiving. Removing substance from the flesh side of a panel so that two overlapping pieces meet at a constant total thickness. Joins are typically skived to 0.6-0.8 mm. Done correctly, the transition is invisible; done badly, it produces a visible ridge or a weak spot.
- Lap skiving. Thinning the meeting edges of two panels that will overlap, so the join reads as one continuous surface rather than a step. Used on strap ends, gusset joins and handle returns.
- Corner skiving. Reducing substance at fold points — base corners, flap corners, pocket turn-ins — so that several layers can stack without producing a lump. This is the single operation most often skipped on cost-reduced programmes.
- Splitting. Reducing whole panels to a target substance on a splitting machine, normally 1.0-1.4 mm for bag bodies and 0.6-0.8 mm for linings and turn-ins. Consistency matters more than the target figure; a panel that varies by 0.2 mm will pucker under stitch.
- Creasing. Running a heated creasing iron along a marked line to press a decorative and functional groove into the grain. The crease sets the stitch line, protects it from abrasion, and gives the seam a defined shadow.
- Stitch setting. Compressing a sewn seam with a bone folder or setting machine immediately after sewing so that the thread beds into the leather rather than sitting proud of it.
- Reinforcement. Adding a backing plate, an interlining or a second ply behind any point that will carry load or take hardware. Handle tabs, D-ring anchors and strap roots should never be single-thickness.
- Edge bevelling. Cutting a chamfer on both faces of an edge before finishing, so that paint or burnishing compound has a surface to sit on and the finished edge feels rounded rather than square.
- Grain direction. Cutting panels so that the stretch of the hide runs consistently. Panels cut across the grain will creep and distort under load, particularly on long gussets and unstructured bodies.
- Adhesive control. Applying contact cement thinly and evenly, with defined open time. Excess adhesive bleeds at seams, stiffens the leather and telegraphs through the grain as a dark halo.
A useful diagnostic for buyers: turn the bag inside out and look at the flesh side of a structural join. Skiving errors, adhesive bleed and inconsistent reinforcement are all visible there, and none of them can be photographed away on the outside. A production partner who is confident about prep work will show you the interior without hesitation.
Embossing, Debossing and Hot Stamping
Branding on leather is applied by pressure, heat, or both. The three processes are frequently confused in specifications, and the confusion is expensive, because each requires different tooling, suits different leathers, and produces a different result under raking light. The distinction is simple: embossing raises the mark above the surface, debossing presses it below, and hot stamping transfers a foil or pigment while pressing.
| Attribute | Embossing | Debossing | Hot stamping (foil) |
|---|---|---|---|
| Result | Mark stands proud of the grain | Mark sits below the grain | Metallic or pigmented film bonded into a shallow depression |
| Tooling | Matched male and female die; brass or magnesium for volume, steel for long runs | Single die pressing into a resilient pad; simplest tooling of the three | Heated die carrying foil; a separate die is needed per artwork and per foil colour |
| Typical depth | 0.3-0.8 mm relief depending on leather substance | 0.2-0.5 mm | 0.1-0.2 mm impression with the foil film on top |
| Best leather | Vegetable-tanned, firm, higher substance; holds relief | Most full-grain and corrected-grain leathers | Smooth, tight-grain finishes; rough or heavily oiled leather rejects foil |
| Contrast | Low contrast; read by shadow | Low to medium contrast; read by shadow | High contrast; visible at distance, and the only option for a metallic gold or silver mark |
| Durability | Very high; relief persists through wear | Very high; pressed into the fibre | Moderate; foil can abrade on high-contact areas such as handle roots |
| Cost driver | Matched die set, longer set-up | Lowest tooling cost; fastest to sample | Die per artwork plus foil inventory; colour matching adds time |
Choosing between them is a design decision before it is a production one. Debossing is the default for a quiet, tonal mark and is the most forgiving on mixed leather batches. Embossing suits heritage programmes where the relief itself is part of the story, but it needs a firm, vegetable-tanned hide and consistent substance to read cleanly. Hot stamping is the only route to a genuine metallic mark and is standard on lining, dust bags and interior labels, where abrasion is limited.
- Test on the actual production leather. A die that reads beautifully on a firm sample hide can disappear into a soft, oiled batch. Approve the mark on the leather you are buying, not on a swatch card.
- Fix the temperature band. Foil stamping and heat-assisted debossing both sit in a narrow window: too cool and the foil will not release, too hot and the grain collapses or the finish scorches.
- Control placement with a jig. Handheld placement drifts. A positioning jig or marked template is the difference between a consistent run and a rejection at inspection.
- Confirm tooling ownership and storage terms. Tooling is a programme asset. Establish who holds it, how long it is retained, and what happens if it is modified.
- Allow for colour variance between batches. Even within a single tannery, dye lots shift. A logo foil matched to batch one may read differently against batch four.
Hardware Application Techniques
Hardware is the most common source of returns on leather bags, and the least discussed at specification stage. A fitting rarely fails because the metal is weak; it fails because it was set into the wrong number of plies, with the wrong clearance, using a die that did not match the post. The following checklist covers what should be defined in writing before sampling.
| Setting method | How it works | Best for | Watch for |
|---|---|---|---|
| Rivet with washer | Post passes through all plies and is capped over a washer on the reverse | D-ring tabs, strap roots, handle anchors | Post length must match total ply thickness; a post that is too long mushrooms, too short will not roll |
| Screw post (Chicago screw) | Two-part fitting threaded together, removable | Sample iterations, repairable constructions | Can loosen under vibration unless thread-locker is specified |
| Sewn-on fitting | Hardware foot is stitched to the panel through a reinforcement patch | Magnetic closures, feet, decorative plates | Stitch density and reinforcement size must be specified; this is a load path, not decoration |
| Eyelet or grommet | Two-part ring rolled through a punched hole | Drawcord channels, lacing, ventilation | Punch diameter must match the eyelet barrel exactly; an oversized hole tears out |
| Spring-loaded catch | Mechanical closure set into a recessed pocket | Turn-locks, twist closures | Recess depth and alignment tolerance; a catch that sits proud will scuff adjacent leather |
- Confirm ply count at every fitting. No load-bearing fitting should be set into a single thickness. Specify two plies plus a reinforcement patch at strap roots and handle anchors.
- Match the die to the post. A setting die that does not match the post profile produces a cap that looks seated and is not. Ask to see the die specification.
- Set plating and salt-spray expectations. Define the finish (for example, brushed brass, palladium, gunmetal) and a performance expectation, rather than simply "gold hardware".
- Verify pull and twist resistance. A correctly set rivet resists thumb rotation and does not rock. Build a defined pull test into the inspection plan.
- Check zips end to end. Tape colour, slider finish, puller weight and end-stop security should all be named. Zip failure is a fitting failure, not a leather failure.
- Confirm REACH and CPSIA compliance for the market. Hardware is a frequent non-conformance point on restricted-substance testing, particularly for plating and coatings.
- Protect adjacent leather during setting. Scratched grain around a fitting is a reject. Masking or a protective pad on the setting tool should be standard practice.
- Specify spare fittings in the shipment. A small allowance of spare rivets, pulls and posts turns a repair into a five-minute job rather than a return.
How to Inspect Craftsmanship in a Sample
Sample approval is the last point at which craftsmanship can still be corrected cheaply. Once bulk is cut, a stitch density dispute becomes a negotiation rather than a specification. The checklist below is designed to be worked through in about twenty minutes with a loupe, a rule, a white cloth and a spring balance, and each line should have a written accept and reject state agreed before the sample arrives.
| Check | How to inspect | Accept | Reject |
|---|---|---|---|
| Stitch type at structural seams | Inspect an untrimmed seam end under a loupe | Two independent thread runs crossing in each hole | Single interlocked run, or a chain loop at the underside |
| Stitch density | Count crowns over 25 mm at three positions per seam | Within the specified band, tolerance plus or minus 1 SPI | Drift beyond tolerance, or a drop of 2 SPI or more at corners |
| Seam straightness | Sight along the seam under raking light | Seam follows the crease line in one plane | Wandering line, or a seam that rides over the crease |
| Thread tension | Press a fingernail across the seam and release | Thread beds into the leather and recovers | Looped thread, visible bobbin on the face, or puckering |
| Edge coat integrity | Rub with a dry white cloth, then flex the edge | No colour transfer, no cracking at the flex point | Transfer, cracking, peeling, or a tacky surface |
| Edge smoothness | Draw a finger along the full edge run | Continuous, even, no ridges between coats | Ridges, sanding marks, or visible coat boundaries |
| Join bulk | Feel across every join and folded corner | Constant thickness with no step | A ridge, a lump, or a springy return at the fold |
| Skiving quality | Turn the bag inside out and inspect the flesh side | Even taper with no exposed fibre tears | Torn areas, uneven taper, or skiving that cuts through |
| Branding depth | Tilt the panel under raking light | Consistent depth with clean shoulders | Shallow patches, double-struck marks, or scorched grain |
| Foil adhesion | Apply and remove a standard tape test on a sample swatch | No foil lift on release | Any foil transfer to the tape |
| Hardware security | Attempt rotation and lift with thumb pressure | No movement, no rocking, washer fully seated | Any rotation, rocking, or a cap that has not rolled |
| Hardware alignment | Close the bag and sight both halves | Closures meet centrally, feet sit square | Misaligned catches, or one foot carrying all the load |
| Lining fit | Check the lining against the body at corners and base | Sits clean with no tension or pooling | Puckering, twisted lining, or pooling at the base |
| Interior cleanliness | Inspect the full interior under strong light | No adhesive bleed, no thread ends, no stray marks | Adhesive halo, untrimmed ends, or tooling marks on the grain |
Two procedural points make this checklist work. First, inspect two units, not one: a single hand-made sample can be the work of the senior bench and tell you nothing about the line. Second, record every result in writing against the specification, with photographs, and return the marked-up document as part of the approval. Verbal approval of a sample is the origin of most bulk disputes.
The inspection standard applied to bulk should be stated at the same time. Programmes coordinated from our SGS-verified production floor in Quanzhou run to AQL 2.5 (ISO 2859-1), single sampling, general level II, with craftsmanship defects classified as major where they affect service life — a broken saddle stitch, a cracked edge, a loose rivet — and minor where they are purely cosmetic. Agreeing the defect classification before bulk is as important as agreeing the stitch count.
Specify the craftsmanship, not the adjective
Send us your reference bag, your target price band and your market. The programme team will return a written craftsmanship specification — stitch type and density per seam, edge finish and coat count, skive depths, branding method and hardware setting — with sampling quoted at 6-10 working days and bulk at 35-50 days after approval. Email service@junyuanbags.com or reach us on WhatsApp at +86 177 5002 0688.
Frequently Asked Questions
What is a saddle stitch in leather craftsmanship?
A saddle stitch is a hand-sewn construction that uses two needles on a single length of waxed thread. Both needles pass through each hole from opposite sides in sequence, and the two thread runs cross inside the hole. Because every stitch locks independently, breaking one does not release its neighbours. This is the key structural difference from a machine lock stitch, where the needle and bobbin threads interlock at a single point and a break can propagate under load.
Is a saddle stitch stronger than a machine stitch?
Yes, in the specific sense that matters in service: a saddle stitch degrades locally rather than catastrophically. Each stitch is an independent lock, so a broken or abraded stitch becomes a cosmetic defect while the seam stays closed. A machine lock stitch can run from a single break when the seam is under sustained tension. Machine stitching remains the correct choice for long non-structural runs and linings, where speed and consistency outweigh that advantage.
What does SPI mean in leather stitching?
SPI means stitches per inch, counted along the seam, and it is the standard measure of stitch density. Typical values are 6-7 SPI for standard production work, 7-9 SPI for premium hand-sewn structural seams, and 9-11 SPI for fine calfskin and small leather goods. Higher is not automatically better: very high density on a soft hide perforates the leather and reduces tear resistance, so density must be specified per seam position.
What is a good stitch density for a leather handbag?
For most bag-weight full-grain leather, 7-9 SPI on hand-sewn structural seams is the target band, and 6-7 SPI is acceptable for machine-sewn non-structural runs. Heavy bridle and luggage leathers deliberately sit lower at 4-5 SPI because the substance is greater. Anything above roughly 10 SPI on a load-bearing seam should be questioned and supported by a pull test rather than approved on appearance alone.
What is edge painting on leather?
Edge painting is the application of two to five thin coats of a flexible water- or solvent-based coating to the raw edge of a leather panel, with sanding between coats and sometimes a wax top-coat. It seals the exposed fibre against moisture and abrasion and produces the smooth, uniform edge associated with structured luxury bags. Most failures — cracking, peeling, colour transfer — come from poor surface preparation or too-thick coats rather than from the paint.
What is a burnished edge?
A burnished edge is produced by bevelling the edge, sanding it through progressively finer grits, dampening it, and then rubbing it with a wood or canvas slicker and a dressing such as gum tragacanth or beeswax until the fibres lie down and polish. It works best on vegetable-tanned leather, which is dense and responds to moisture. It is slightly less uniform than a painted edge but is repairable in service and improves with handling.
Why do painted edges crack?
Painted edges crack for preparation reasons, not material ones. The usual causes are insufficient sanding between coats, a coat applied too thickly so it skins before it cures, inadequate cure time before the sample or shipment is handled, a substrate that was not de-greased, or a paint system whose flexibility does not match the leather underneath. Specifying coat count, intermediate grit and cure time prevents most of these failures.
What is skiving in leather bag making?
Skiving is the removal of substance from the flesh side of a leather panel so that overlapping pieces meet at a constant total thickness, typically 0.6-0.8 mm at joins. It is used on lap seams, strap ends, gusset joins and pocket turn-ins. Without it, every join becomes a visible ridge and every fold becomes a lump. Corner skiving, which thins the leather at fold points, is the operation most often omitted when a programme is cost-reduced.
What is the difference between embossing and debossing?
Embossing raises the mark above the surface of the grain using a matched male and female die set. Debossing presses the mark below the surface using a single die against a resilient pad. Embossing gives more tactile relief and suits firm, vegetable-tanned hides; debossing is simpler, cheaper to tool, more forgiving across leather batches, and is the standard choice for a tonal logo.
Is hot stamping the same as embossing?
No. Hot stamping uses a heated die to transfer a metallic or pigmented foil film onto the leather while making a shallow impression. Embossing uses pressure alone, or pressure with gentle heat, to raise the leather itself. Hot stamping is the only practical route to a genuine gold or silver metallic mark and performs best on smooth, tight-grain finishes; heavily oiled or rough leather tends to reject foil.
How can I tell if a bag is hand stitched?
Look at an untrimmed seam end under a loupe. If two thread runs enter the leather independently and cross inside each hole, the seam is hand saddle-stitched. If one thread passes through and a second loops over it below the surface, it is a machine lock stitch. Hand stitching also shows a slightly angled, irregular crown with visible depth, whereas machine stitching lies flat and perfectly even.
Which edge finish lasts longest?
A piped or bound edge generally lasts longest, because a separate strip takes the abrasion instead of the panel itself, which is why it is standard on luggage and travel pieces. A folded edge is also very durable because no raw fibre is exposed. Painted and burnished edges both perform well when correctly applied, though painted edges are more likely to show cosmetic cracking over time.
How long does it take to sample a craftsmanship-led leather bag?
Sampling for a craftsmanship-led leather bag programme runs 6-10 working days, extending to 12-15 working days for complex constructions involving custom tooling, bound edges or multi-ply reinforced hardware. Bulk production follows at 35-50 days after sample approval. These figures assume the craftsmanship specification is agreed before cutting, including stitch type, density, edge finish and hardware setting method.
What inspection standard applies to craftsmanship defects?
Programmes coordinated from our SGS-verified production floor in Quanzhou run to AQL 2.5 (ISO 2859-1), single sampling, general level II. Craftsmanship defects are classified as major where they affect service life — a broken saddle stitch on a structural seam, a cracked edge, a loose rivet — and minor where they are purely cosmetic. Agreeing that classification before bulk is as important as agreeing the stitch specification itself.
Does higher stitch density always mean better craftsmanship?
No. Stitch density must suit the leather substance, the thread diameter and the load the seam will carry. Very high density — above roughly 10-12 SPI — perforates the hide along the seam line and can reduce tear resistance on bag-weight leathers, which is why couture-level density appears on show pieces rather than on working bags. Consistency along the seam, including through corners, is a better indicator of craftsmanship than the raw number.