A leather bag moves from approved specification to finished product in six stages: design translation into a tech pack, material intake and cutting, assembly and stitching, turning and structuring, hardware and finishing, then inspection and packing. Each stage produces a physical artefact that the next depends on, so a defect introduced at stage three cannot be corrected at stage six — it can only be hidden, briefly. This page walks the leather bag manufacturing process stage by stage, sets out what must be specified at each point, and gives brand-side buyers the checks that matter when they are standing on a production floor.
Programme parameters at a glance
| Parameter | Commitment |
|---|---|
| Minimum order quantity | 500 pieces per style / colourway |
| Sampling lead time | 6–10 working days (12–15 days for complex constructions) |
| Bulk production lead time | 35–50 days after sample approval |
| Inspection standard | AQL 2.5 (ISO 2859-1), single sampling, general level II |
| Incoterms | FOB Xiamen — EXW, CIF and DDP available on request |
| Payment terms | T/T 30% deposit / 70% before shipment; L/C at sight for container loads |
| Verified production floor space | 4,950 m² (SGS-verified) |
| Team | 137 staff across 7 production lines |
| Equipment | 149 machines including computerised saddle-stitch and edge-painting units |
| Monthly capacity | 200,000 pieces |
| Entity | Founded 2014; principal has worked in bag development since 2004 |
Everything below reflects one operating model: a single accountable programme coordinator from first sketch to final carton, production run on our SGS-verified production floor in Quanzhou, Fujian — 4,950 m², 137 staff, 7 lines, 149 machines, 200,000 pieces per month — and inspection executed to a published statistical standard rather than by goodwill. The entity behind it was founded in 2014, with its principal in the trade since 2004, which is relevant mainly because most of what follows was learned by getting it wrong first.
A note on scope. This is written for buyers who already understand that leather is a natural material with no two hides alike, and who need process detail rather than romance: what is measured, what is toleranced, what is recorded, and whose signature sits where. If you are earlier in the journey, start with our leather craftsmanship techniques guide, which covers the hand skills this page assumes.
How a Leather Bag Is Made: the Short Answer
In its shortest useful form, the answer to how leather bags are made is this: a written specification is converted into cut panels, those panels are joined into a three-dimensional shell, the shell is given its shape and its load-bearing structure, and then every closure, edge and fastening is finished before the unit is measured against a sealed reference sample. Nothing in the sixth stage can rescue work that was not specified or cut correctly in the first three.
- Design translation and tech pack. A sketch or reference unit becomes drawings, tolerances, a bill of materials, a construction sequence and a hardware schedule.
- Material intake and cutting. Hides, linings, interlinings and trims arrive, are inspected against reference swatches, graded by usable area, then cut to a nest with correct grain direction.
- Assembly and stitching. Panels are skived, reinforced and sub-assembled flat while closures and pockets can still be reached, then joined seam by seam into a shell.
- Turning and structuring. The shell is inverted, corners are drawn, interlining is set and the bag is formed to hold its intended silhouette.
- Hardware and finishing. Feet, rings, rivets, magnets and locks are set; edges are bound, painted or burnished; threads are trimmed and surfaces cleaned.
- Inspection and packing. Units are sampled and inspected to AQL 2.5 (ISO 2859-1), single sampling, general inspection level II, then packed against the packing instruction.
| Stage | What it produces | Decisions locked here | What goes wrong |
|---|---|---|---|
| Tech pack | A written, costed, unambiguous specification | Dimensions, tolerances, materials, hardware, target cost | Silhouette agreed verbally with nothing measurable to build against |
| Intake and cutting | Panels of correct grain, thickness, shade and count | Yield, matching rules, skive thickness, replacement rate | Panels cut off-grain; shortages discovered mid-line |
| Assembly and stitching | A sewn shell with defined internal architecture | Seam sequence, stitch density, thread, reinforcement placement | Wrong stitch density; defects buried behind lining |
| Turning and structuring | A body that holds its designed shape | Turn method, corner definition, interlining grade and placement | Soft or twisting body; corners that never square |
| Hardware and finishing | Working closures and load-bearing points | Plating spec, setting force, edge finish method | Spun rivets, abraded plating, edge paint cracking at the fold |
| Inspection and packing | Cartons matching the sealed reference unit | AQL and defect classes agreed before bulk starts | Standard argued after production when no reference unit exists |
The order matters more than it looks. Because each stage consumes the previous one, the cost of a correction rises steeply as the bag progresses: a tolerance error costs a paragraph change at tech-pack stage, a discard at cutting stage, and a reworked or scrapped unit at finishing stage. Programme experience suggests the majority of bulk disputes trace back to a stage-one or stage-two ambiguity rather than to poor workmanship further down.
Stage 1-2: Design Translation and Tech Pack
Design translation is the work of converting intent into something a pattern cutter, a machinist and a purchasing clerk can each read without calling anyone. A designer's drawing shows a bag; a tech pack defines one. The difference is measurement, tolerance, material equivalence and sequence, and it is the single highest-leverage document in the entire leather bag manufacturing process.
Most tech packs that arrive with a brief are incomplete in predictable places: no tolerances, no seam sequence, hardware listed by photograph rather than by finish specification, and no consumption figures for costing. Completing them is normal work for the programme team and is done inside the sampling window, but every missing field delays feasibility and weakens the buyer's position later if bulk diverges from expectation.
| Tech pack section | What it contains | Why it matters on the line |
|---|---|---|
| Cover sheet | Style number, season, revision index and date, named technical contact on both sides | Every subsequent change is versioned against this; disputes start here too |
| Technical drawings | Orthogonal views, dimensions in millimetres, tolerances, callouts for stitch lines and reinforcement zones | The only part of the pack a cutter or machinist reads more than once |
| Bill of materials | Every component: material, colour reference, supplier or specified equivalent, consumption per unit, unit cost | Costing, purchasing, substitution control and lead-time planning all originate here |
| Panel list | Every panel with piece count per unit, cut notes, grain direction and skive requirements | Prevents short or mixed sets when the line loads |
| Construction notes | Seam sequence, seam allowance, stitch density, thread type and ticket, edge finish method, reinforcement placement | Determines how the bag is built, how long it takes and how much skill it needs |
| Hardware schedule | Item, base metal, finish and plating thickness, dimensions, setting method, pull-test requirement | Hardware is the most common cause of late-stage failure and the hardest to rework |
| Branding and labelling | Logo application method and position, country of origin, material composition wording, care wording | Errors here are invisible until packing and expensive to correct there |
| Compliance references | Required testing regimes by destination market — for example REACH restricted-substance screening for the EU or CPSIA lead and phthalate limits where they apply | Testing is booked at material-selection stage, not at final inspection |
| Packing instruction | Folding method, tissue and stuffing, polybag specification, carton quantities, barcode placement | Protects the finish in transit and prevents retail chargebacks |
Two fields deserve special mention because they are so often left blank. The first is tolerance: without a stated tolerance, every dimension is arguably met and none is enforceable, and pattern pieces drift apart as they are graded or re-drafted. The second is material equivalence: naming one tannery and no equivalent means any supply interruption stops the programme, while naming none means substitution happens silently.
Where the buyer carries no technical resource, this stage is where OEM and ODM diverge. Under OEM and ODM programme structures the document is either received or drafted, but a substantial part of it is typically written jointly, because the construction notes need input from the people who will build the bag. A tech pack written entirely in isolation tends to specify things that look right on paper and are slow or impossible to assemble.
Stage 3: Material Intake and Cutting
Nothing downstream can be better than what arrived. Incoming leather is checked against approved swatches for shade, hand, thickness and surface finish; linings and hardware are counted and visually inspected; trims are verified against the schedule. Batch-to-batch shade variation is normal and manageable when it is noticed before cutting, and expensive when it is noticed after assembly, because panels cut from two hides will not sit together in the same body.
Hides are then graded by usable area. Insect damage, healed scars, brand marks and spine lines mean the cuttable area of a hide varies considerably, so cutting yield is a function of both pattern layout and hide quality, and it directly affects unit cost through replacement rates. Buyers rarely see this calculation, which is why two quotations for the same design can differ meaningfully: one has priced the leather it takes to actually produce the bag, and the other has priced the theoretical area of the panels.
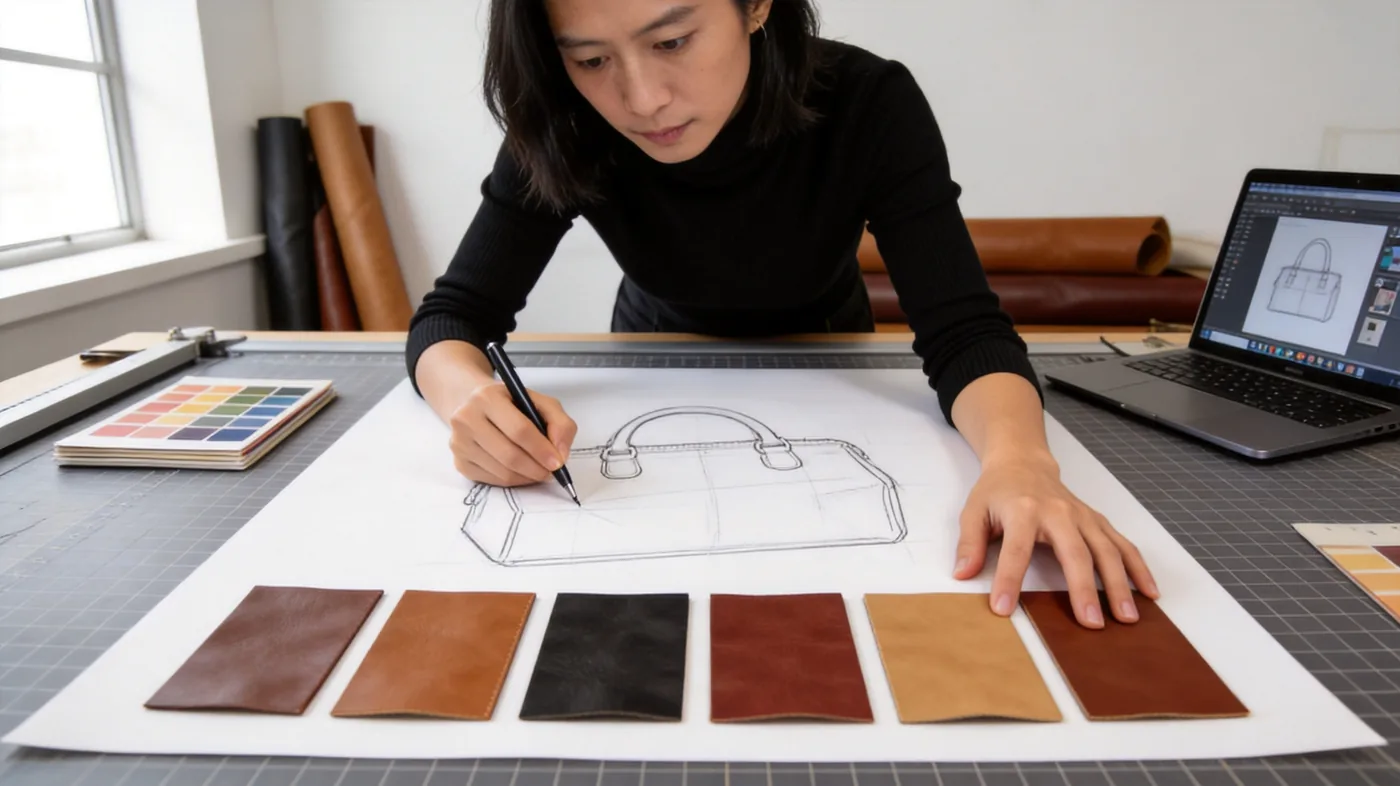
Grain direction is the other non-negotiable. Leather stretches differently along and across the fibre structure, so panels with structural or visual duty — handles, straps, bag bodies that must not sag — are cut with the grain running the right way. Cut them incorrectly and no amount of interlining will stop long-term distortion.
| Cutting method | Best suited to | Accuracy and yield | Notes for buyers |
|---|---|---|---|
| Clicker press (die cutting) | Repeat production of identical panels at volume | High repeatability; yield depends on die layout and hide shape | Dies are tooling: they cost money and take lead time, so release them early |
| CNC oscillating knife / digital cutter | Development work, graded patterns, small runs, precise matching requirements | Very high accuracy against the digital nest; excellent panel-to-panel matching | Ideal when patterns evolve between sample rounds |
| Laser cutting | Intricate outlines, perforation, engraving; synthetics and coated materials | High precision; risk of scorched or hardened edges on some natural leathers | Approve edge condition on a physical sample before committing a full run |
| Strap and slitting machine | Handles, straps, belts and binding at consistent width | Consistent width under controlled feed tension | Watch for taper at the start and end of each run |
| Skiving machine | Reducing panel thickness at folds and joins | Reduces to a set thickness across a set width, repeatably | Uneven skiving shows immediately as a ridge along the finished fold |
| Hand cutting | Prototypes, one-off matching, repair and re-cuts | Slow, and entirely dependent on the individual | Normal in the sampling room; a warning sign in bulk |
Whichever method is used, three controls separate a competent cutting room from a chaotic one. The first is panel marking: every panel leaving the table is identified by style, size and position, so sets do not mix. The second is bundle counting against the order quantity plus an agreed cutting allowance, reconciled before the bundles reach the line. The third is logging rejected panels so shortages appear as a number in a record rather than as a surprise on day nine of bulk.
- Shade grouping. Panels destined for the same bag or the same visible face are cut consecutively and kept together through assembly.
- Nesting log. The layout used is retained, so a re-cut reproduces the same yield and grain orientation.
- Skive verification. Thickness is spot-checked with a gauge at the start of each batch, not visually estimated.
- Edge and panel protection. Bundles are wrapped or boxed; leather edges abrade each other in transit more than buyers imagine.
- Interlining handling. Fusible interlinings are applied with controlled temperature, dwell and pressure, then rested before further work.
Traceability closes the loop. Where tannery provenance matters to the brief — a common requirement now, driven by coverage in titles such as Business of Fashion and by corporate due-diligence rules — asking for LWG-audited tannery options or OEKO-TEX certified linings belongs at this stage, along with any REACH screening decision for European destinations. Once material is cut, provenance questions become reconstruction exercises.
Stage 4: Assembly and Stitching
Assembly is where most of the labour sits and most of the visible quality is decided. The governing principle is simple to state and easy to violate: every operation is performed while the area it affects is still accessible. That is why pockets, card slots and zip faces are built before the shell closes, and why a mismatch between the tech pack's stated sequence and the sequence actually used on the line is worth investigating on a visit.
- Panel preparation. Skives checked, reinforcement taped or pasted, panels marked with their position and, where required, matched and numbered.
- Sub-assembly. Internal architecture built flat: pockets, dividers, slip pockets, zip faces, phone and card slots, linings.
- Closure installation. Zips, magnets, turn-locks and press-studs set into their panels while those panels are still open and flat.
- Body assembly. Outer panels joined seam by seam in reverse order, with the last seam left open for turning.
- Handle and strap attachment. Load points stitched through reinforcement and secured with bartack or box stitching.
- Turning and binding. The shell is inverted, corners drawn, then edges bound or turned to enclose the seam allowance.
- Closing seam and topstitching. The final seam is run and the visible decorative lines added last, when symmetry can be judged on a whole bag.
| Operation | Typical machine or method | Specification to agree | Failure signs visible on the floor |
|---|---|---|---|
| Flat construction seams | Single-needle lockstitch, walking foot where layers stack | Stitch density, seam allowance, thread type and ticket | Skipped stitches at thickness changes; seam creep under load |
| Turned and topstitched seams | Single-needle with compensating foot or post bed | Distance from edge and tolerance for parallel lines | Wavy stitch lines at corners and around hardware ends |
| Load points | Bartack or rectangular box stitch over a reinforcement patch | Bar length, number of bars, reinforcement dimensions | Stitch through top grain only, with nothing behind the strap |
| Binding | Binder attachment with bias-cut binding, or folded self-binding | Finished binding width, cut of the binding material, stitch bite | Binding too narrow to grip, or cut straight so it wrinkles at curves |
| Basting before final runs | Temporary tacking, then removal | Where temporary holds are permitted to leave needle marks | Visible needle holes left in finished surfaces |
| Zip assembly | Single-needle with zip foot, end-stop reinforcement | Tape width, slider type matched to tape, end-stop construction | Slider that jams at the seam or opens under lateral load |
Stitch density deserves attention because it is the most commonly argued specification. Too dense and the leather is perforated along the seam line, weakening it; too open and the seam gaps under load. The correct figure depends on leather thickness, thread and the duty the seam carries, so it belongs in the construction notes as a number with a tolerance rather than as a habit passed between operators.
Thread choice is the paired decision. Bonded polyester and bonded nylon dominate the category for strength and colour stability; cotton thread reads more traditionally and is chosen in some heritage constructions with an accepted strength trade-off. Whatever is specified should also appear on the bill of materials with a colour reference, because thread is bought in lots and a mid-bulk substitution changes the look of every bag produced after it.
- Needle control. Broken needle fragments must be accounted for one-for-one and recorded, particularly for programmes shipping to markets with metal-detection requirements.
- In-line checks. Dimension and symmetry are verified at defined checkpoints, not discovered at the end of the line.
- Operator capability matching. Binding, topstitching around hardware and corner work are skilful operations; line assignment reflects that.
- Spare allowance. Extra bundles are cut so the line can absorb unavoidable damage without stopping for a re-cut.
Stage 5: Turning, Structuring and Hardware
A sewn shell is not yet a bag. Between the closing seam and finished edge there is a set of operations that determines whether the product reads as structured or slack, whether the base supports its contents, and whether closures still work after six months of daily use. This stage is also the last point at which structural weaknesses are affordable to fix.
- Turning. The shell is inverted through a deliberately left opening, using a bodkin or blunt point — never a sharp awl, which forces the leather rather than easing it.
- Corner definition. Corners are drawn square from inside before anything sets; a poor corner is permanent once the bag is topstitched.
- Body forming. Damp or steam forming shapes the panels where the design requires a formed rather than stuffed silhouette.
- Interlining and stabiliser. Bonded, fused or sewn-in, chosen by grade for the amount of body the design needs and the leather's natural weight.
- Base support. Base boards or stiffened panels are inserted and, where designed, secured rather than floating inside the lining.
- Hardware setting. Rings, hooks, feet and plates are set through the correct number of plies with the specified backing.
- Rivets and burrs. Post length is matched to the stacked thickness so the setting force clenches rather than gaps or crushes.
- Foot studs. Fitted with a backing washer or reinforcement patch so a loaded bag does not push them through the leather.
- Magnets and closures. Grade selected against the total panel stack the magnet has to pull through, not against a swatch.
- Final topstitching. Visible lines run last, once the whole bag can be assessed for symmetry.
| Failure | Usual cause | Agree this before bulk |
|---|---|---|
| Rivet spins or pops | Post length wrong for the stack, or setting force too low | Pull and twist testing on a sample from each lot, with the result recorded |
| Plating abrades quickly | Plating thickness below specification, or no protective topcoat | Written plating specification plus a rub test against an agreed benchmark |
| Magnet fails to close | Grade selected against too light a panel stack | Cycle test through the production panel stack rather than a single swatch |
| Foot studs push through | No backing washer or reinforcement behind the leather | Backing specified on the hardware schedule and shown on the drawing |
| Handle droop or twist | Grain direction wrong, or no internal reinforcement in the handle | Construction specified panel by panel, including reinforcement and fold count |
Hardware is disproportionately represented in complaints because it is the part a customer operates directly and the part with the least tolerance for being nearly right. It is also the component most often nominated by the buyer from a third-party supplier, which introduces its own risk: nominated hardware arrives on someone else's lead time, in someone else's packing, with someone else's quality distribution. Where brand hardware is non-negotiable, incoming inspection has to apply to it exactly as it applies to sourced components.
Stage 6: Finishing, Inspection and Packing
Finishing covers what the customer touches: edge treatment, thread trimming, cleaning, final shaping and the application of branding or protection treatments. There are three broad ways to deal with a raw leather edge, and the choice is a specification rather than a preference. Bound edges enclose the raw edge in a folded strip and are the most durable; painted edges are layered, dried and sanded to a smooth continuous line and suit contemporary constructions; burnished edges are slicked and polished and suit heavier vegetable-tanned leathers with a thicker, less formal look.
Inspection follows, and it is a statistical exercise rather than an opinion. We inspect to AQL 2.5 (ISO 2859-1), single sampling, general inspection level II, which fixes both the number of units to draw from a lot and the number of defects that triggers accept or reject. Because the sample size and accept-reject thresholds are published standard values rather than house rules, a buyer can audit them; that is the whole point of using a named standard.
| Lot size (pieces) | Code letter | Sample size | Accept | Reject |
|---|---|---|---|---|
| 26-50 | D | 8 | 0 | 1 |
| 51-90 | E | 13 | 0 | 1 |
| 91-150 | F | 20 | 1 | 2 |
| 151-280 | G | 32 | 2 | 3 |
| 281-500 | H | 50 | 3 | 4 |
| 501-1200 | J | 80 | 5 | 6 |
| 1201-3200 | K | 125 | 7 | 8 |
| 3201-10000 | L | 200 | 10 | 11 |
| 10001-35000 | M | 315 | 14 | 15 |
| 35001-150000 | N | 500 | 21 | 22 |
Two practical qualifications. First, the table above sits at normal inspection severity; ISO 2859-1 defines switching rules to tightened or reduced inspection based on recent lot history, and those transitions should be agreed in advance so neither side claims a result the other did not expect. Second, defect counting is only meaningful once defects are classified, so the classes below belong in the tech pack, written before bulk begins.
| Class | Definition | Typical examples in bags |
|---|---|---|
| Critical | Makes the product unsafe, illegal or unusable in its intended market | Embedded needle fragments, sharp exposed hardware edges, missing labelling required by the destination market |
| Major | Visible or functional, and reasonably likely to cause a return or complaint | Panels misaligned beyond stated tolerance, broken or skipped stitch, closures that fail to engage, dimensions outside tolerance, colour outside the approved strike-off range |
| Minor | A deviation from standard unlikely to affect saleability or function | Thread tails within an agreed limit, negligible shade variation between approved batches, light surface marks not visible at normal viewing distance |
Reference-based inspection sits alongside the statistical plan. The gold seal unit retained at the end of sampling is the physical standard: every measurement, every edge, every hardware setting is argued against that unit rather than against memory or a photograph. Where a divergence is found it is classified, recorded, and handled under the rules agreed before bulk — accept, rework and re-present, or reject. Nothing ships on the assumption that a difference is close enough.
Packing is frequently treated as an afterthought and penalised later in transit. A structured leather bag crushed to fit a carton arrives creased; an unstructured one folded incorrectly arrives with a permanent set. The packing instruction in the tech pack should specify stuffing, tissue, polybag, carton quantity, carton strength and whether units are flat-packed or standing, and it should be signed off as deliberately as the construction. Standard commercial terms are FOB Xiamen with EXW, CIF and DDP available on request, and payment by T/T 30% deposit with 70% before shipment.
Underpinning all of this is a quality management system. Buyers sourcing for regulated markets reasonably ask which certified systems sit behind the production records — ISO 9001 for quality management and ISO 14001 for environmental management are the usual starting points — and complete documentation for materials referenced against frameworks such as ASTM methods for abrasion, colour fastness and hardware pull can be requested. The relevant point for a visiting buyer is simple: ask which checkpoints have records, then read the records rather than the certificates. Our quality control service sets out how those checkpoints are structured.
Where Timelines Go: 6-10 Day Sampling, 35-50 Day Bulk
Development moves quickly and production does not, and the asymmetry surprises first-time buyers. Sampling takes 6-10 working days — 12-15 for complex constructions — because it is skilled hand-work in a sampling room, not line output. Bulk takes 35-50 days after sample approval because material has to be booked and received, tooling has to exist, and several hundred units have to pass through a sequence where most operations cannot be undone.
| Phase | Elapsed time | What happens | What the buyer must supply or decide |
|---|---|---|---|
| Brief and feasibility | Start | Drawings or references reviewed; construction and materials assessed for feasibility and cost | Drawings, references, target cost, intended market |
| Tech pack construction | Within the sampling window | Specification written or completed, bill of materials costed, patterns drafted | Answers to technical queries; confirmation of hardware direction |
| Sampling | 6-10 working days (12-15 complex) | Patterns cut and a sample built by hand | Feedback consolidated into a single marked revision round |
| Sample review and approval | Buyer-side, variable | Fit, look and function assessed; gold seal unit agreed | Approval, or one consolidated set of corrections |
| Materials and preparation | Early part of the bulk window | Leather, linings, hardware and trims booked, received and inspected; dies made; lines loaded | Signed-off bill of materials and any purchase-order amendments |
| Bulk production | 35-50 days after sample approval | Cutting, branding, assembly, turning, hardware and finishing across seven lines | Nothing, unless the specification is amended |
| Inspection and packing | Final part of the bulk window | AQL 2.5 (ISO 2859-1) inspection executed and recorded; packing completed; documents prepared | Balance payment before shipment |
| Shipment | On completion | Released FOB Xiamen; EXW, CIF or DDP available on request | Consignee and routing instructions |
The largest uncontrolled variable in that schedule is not production time; it is the approval loop. Five rounds of feedback with one comment each consume considerably more calendar time than one round with five comments, because every return triggers rescheduling in the sampling room. Consolidating feedback is the highest-value discipline a buyer can bring to a programme.
| Where schedules slip | Typical trigger | Preventive action |
|---|---|---|
| Approval loop | Feedback returned piecemeal across several messages and people | Name one technical decision-maker and consolidate each round into one marked revision |
| Material booking | Nominated leather or hardware unavailable at the booked quantity | Approve a second source at tech-pack stage and record it on the bill of materials |
| Tooling lead time | Dies or custom hardware tooling started after approval instead of during sampling | Release tooling drawings during sampling, not after it |
| Mid-bulk change | A design amendment arrives after materials have been cut | Freeze the specification at gold seal and route amendments through a versioned revision |
| Line loading | Several styles released in the same week across shared lines | Agree a time-and-action calendar at order placement and review it weekly |
Volume thresholds shape the plan as well. Standard minimum is 500 pieces per style and colourway, and that figure is an economic boundary rather than an arbitrary one: setup costs dominate below it and process control improves above it, so unit pricing stops behaving predictably once you cross back underneath. Small-batch pilots exist to test demand and construction before committing to full volume, priced higher per unit because shorter material runs and repeated setups genuinely cost more to serve.
- Freeze the specification at gold seal. Every later amendment has to queue behind work already in progress.
- Book tooling during sampling. Dies and custom hardware tooling are the longest-lead items that nobody remembers ordering.
- Approve two material sources. Supply interruptions do not wait for convenient moments.
- Consolidate feedback. One round with many comments is faster than many rounds with one.
- Plan the approval loop. Internal sign-off time is part of the calendar and should appear on it.
- Ask for the time-and-action calendar. A programme with one shows you where it intends to be and when.
The commercial rhythm bears repeating because it is where many first programmes stall: sampling takes 6-10 working days, bulk takes 35-50 days after sample approval, minimum order is 500 pieces per style and colourway with small-batch pilots available below that, and terms are T/T 30% deposit with 70% before shipment against FOB Xiamen or an agreed alternative incoterm. Costs and schedules that assume otherwise tend to be optimistic rather than efficient.
For a fuller treatment of what each development round contains and how minimum quantities interact with cost, see the luxury bag sampling and MOQ guide, which covers the same figures in greater detail.
What Buyers Should Look for During a Floor Visit
A floor visit tells you more in half a day than a month of email. What you are looking for is not tidiness, although tidiness correlates with discipline; it is evidence of control. Specifically: are the documents real, are the measurements recorded, does the line know what it is building today, and can anyone find the standard it is being built to?
- Find the gold seal unit. Ask where the approved reference sample is kept. It should be on or beside the floor, sealed, signed and reachable in under a minute.
- Read the tech pack in use. There should be a working copy at the line with revision dates, not only a PDF in the office.
- Watch the seam sequence. Compare what the line does with what the construction notes say. Divergence means one document or the other is fiction.
- Check the needle policy. Broken needles returned one-for-one, with a written record and needle fragments accounted for.
- Ask about thread lots. Thread should be traceable by lot to the style and the date it ran.
- Look at the cutting allowance. Spare panels should exist, bundled and labelled, so damage does not stop the line.
- Test hardware yourself. Pull a rivet, cycle a zip, close a magnet on a real unit from the line, not a presentation sample.
- Read inspection records. Counted defects by class and lot history are more informative than any certificate on the wall.
- Ask what is checked in line versus at the end. End-of-line sorting alone means defects are discovered too late to be prevented.
- Trace one unit backwards. Pick a bag and ask which hide, thread lot and operator it came from. The answers tell you how much the system really records.
- Check the packing instruction is being followed. Look at a finished carton before it closes, not after.
- Ask about the sample room and the lines separately. Two different disciplines, two different capabilities; either can be the constraint.
| Area | Question to ask | What a well-run floor shows you |
|---|---|---|
| Cutting room | How are hides graded and panels matched? | A visible grading method, nests retained, and bundles labelled by panel and shade group |
| Material store | How are lots separated and identified? | Lot-labelled materials with clear quarantine for anything awaiting inspection |
| In-line QC | What is checked before the closing seam? | Documented checkpoints; defects logged against an operation rather than sorted out at the end |
| Hardware bench | What pull or cycle testing is performed? | A test method agreed with the buyer and results recorded per delivery lot |
| Finishing | How long are edge coats dried before the next pass? | A stated dwell time and a clean dust-controlled area for edge work |
| Documentation | Which standards do you inspect to? | A cited ISO 2859-1 sampling plan with defect classes agreed before the lot shipped |
Visits are arranged by appointment with reasonable notice at our SGS-verified production floor in Quanzhou, Fujian, and buyers are welcome to walk the material library, the sampling room, the seven lines and the inspection stations. Independent third-party technical and social audits are also supported, and existing audit documentation can be shared in advance; any supplier reluctant to accommodate either deserves careful thought.
The most useful question on any visit is not how many pieces per month, but: show me this bag being made, and show me the record of the last one that failed.
Bring us into your next development
Send drawings, a reference unit or an existing tech pack. The programme team will confirm feasibility, complete the specification and return a quotation you can plan against — sampling 6-10 working days, bulk 35-50 days after approval, MOQ 500 per style and colourway, inspected to AQL 2.5 (ISO 2859-1). Email service@junyuanbags.com, message WhatsApp +86 177 5002 0688, or start from the contact page.
Frequently Asked Questions
How are leather bags made?
A leather bag is made in six stages: design is translated into a written tech pack, materials are received and inspected, panels are cut with correct grain direction, those panels are stitched into a shell, the shell is turned and structured with hardware and interlining, and finished units are inspected against a sealed reference sample before packing. Each stage depends on the one before it, which is why most quality problems trace back to the specification rather than to the sewing.
What is a tech pack for bags and why does it matter?
A bag tech pack is the written specification used to build and cost a design. It contains technical drawings with tolerances, a bill of materials, panel counts, construction notes with seam sequence and stitch density, a hardware schedule with plating specifications, labelling requirements and a packing instruction. It matters because it is the document both sides argue quality against; without measurements on it, bulk adequacy becomes a matter of opinion.
How long does it take to make a leather bag?
Sampling takes 6-10 working days, rising to 12-15 for complex constructions, because it is skilled hand-work rather than line output. Bulk production takes 35-50 days after sample approval, which covers material booking and intake, tooling, line loading, cutting, assembly, finishing and inspection. The approval loop between those two phases is buyer-controlled and frequently the longest single component of the calendar.
Which leather cutting method gives the best accuracy?
Each method optimises for something different. CNC oscillating knife cutting gives the highest accuracy against a digital nest and the best panel-to-panel matching, which suits development work and graded patterns. Clicker press die cutting is highly repeatable at volume but less flexible once patterns change. Laser cutting handles intricate outlines well, though some natural leathers show scorched edges, so approval should always be based on a physical cut sample.
What is skiving, and why is it necessary?
Skiving removes thickness from leather along an edge so that folds sit flat and joins do not create a ridge. It is specified by width and by finished thickness, and it is checked with a gauge rather than by eye. Inconsistent skiving is immediately visible on a finished bag as a bulge along a fold or a mismatch where two panels meet, and it cannot be corrected once the seam has been sewn and topstitched.
How many stitches per inch should a leather bag have?
There is no single correct figure. Stitch density depends on leather thickness, thread type and the duty a seam carries: too dense perforates the leather and weakens the seam line, too open gaps under load. What matters is that a specific density appears in the construction notes alongside the thread specification, agreed with the people who will sew it, rather than being left to operator habit or copied from an earlier style.
What is AQL 2.5 in bag inspection?
AQL 2.5 is an acceptable quality limit applied through the ISO 2859-1 sampling plan. We inspect single sampling at general inspection level II, which fixes how many units are drawn from a lot and how many defects trigger accept or reject. Because those figures come from a published standard rather than house rules, a buyer can audit any result. Defect classes should be agreed and written into the tech pack before bulk begins.
What happens if bulk does not match the approved sample?
The gold seal unit retained at the end of sampling is the physical reference standard. Any divergence is recorded against it, classified as critical, major or minor, and handled under the rules agreed in advance: accept, rework and re-present, or reject the lot. That is precisely why the sample is sealed and why the defect classification belongs in the specification rather than in a conversation held after goods are finished.
Can we supply our own leather or hardware?
Yes, where consistent quality and supply can be maintained. Buyer-nominated materials move lead-time risk onto you and still require incoming inspection to the same standard as sourced components. A common hybrid works well: nominated leather from a preferred tannery combined with hardware developed through the standard tooling route, which keeps both traceability and cost visibility predictable across repeat orders.
Why does a prototype cost more per unit than bulk?
A sample is built once, by hand, outside any line rhythm: the pattern is drafted, materials are pulled in small quantities, machines are reset and the construction is worked out while the unit is being made. None of that amortises across several hundred pieces. Bulk spreads setup and tooling across the run and benefits from repetition, which is exactly why sampling should be treated as de-risking rather than as an expensive unit.
What reinforcement do high-stress areas need?
Handle and strap take-offs should be stitched through a reinforcement patch or internal stabiliser, then secured with bartack or rectangular box stitching sized and counted in the spec. Foot studs need a backing washer so a loaded bag does not push them through the leather, and base panels need board or stiffening appropriate to the intended contents. Load-point failures are structural, so they must be specified rather than discovered.
Can we visit the production floor before placing an order?
Yes, by appointment with reasonable notice. Buyers can walk the material library, sampling room, seven lines and inspection stations at our SGS-verified 4,950 m² production floor in Quanzhou, Fujian, and trace a single unit back through its materials and operations. Independent third-party technical and social audits are supported as well, and existing audit documentation can be shared ahead of a first order.
Which compliance regimes apply to leather bags?
It depends on destination. Shipments to the EU are planned around REACH restricted-substance screening on leathers, coatings and metals; US shipments reference CPSIA limits, which are mandatory for children's products and frequently applied by retailers to general goods. OEKO-TEX certified linings and LWG-audited tannery options are available on request, but compliance is decided at material selection, not at final inspection.
How does an edge finish choice affect a design?
Bound edges enclose the raw leather in a folded strip and are generally the most durable, though they add visual weight. Painted or lacquered edges suit clean contemporary constructions but must be layered, dried and sanded carefully or they crack at the fold. Burnished edges are slicked and polished, reading heavier and more traditional. The choice belongs in the tech pack because it changes both the look and the cost.
What should be checked in the cutting room on a visit?
Ask how hides are graded and how panels are matched within a bag, since visible faces cut from different hides shade differently. Check that every panel is labelled by style, size and position so sets cannot mix, that spare panels exist to absorb damage, and that skive thickness is gauged rather than estimated. Ask to see the retained nest as well, so a re-cut reproduces the same yield and grain direction.