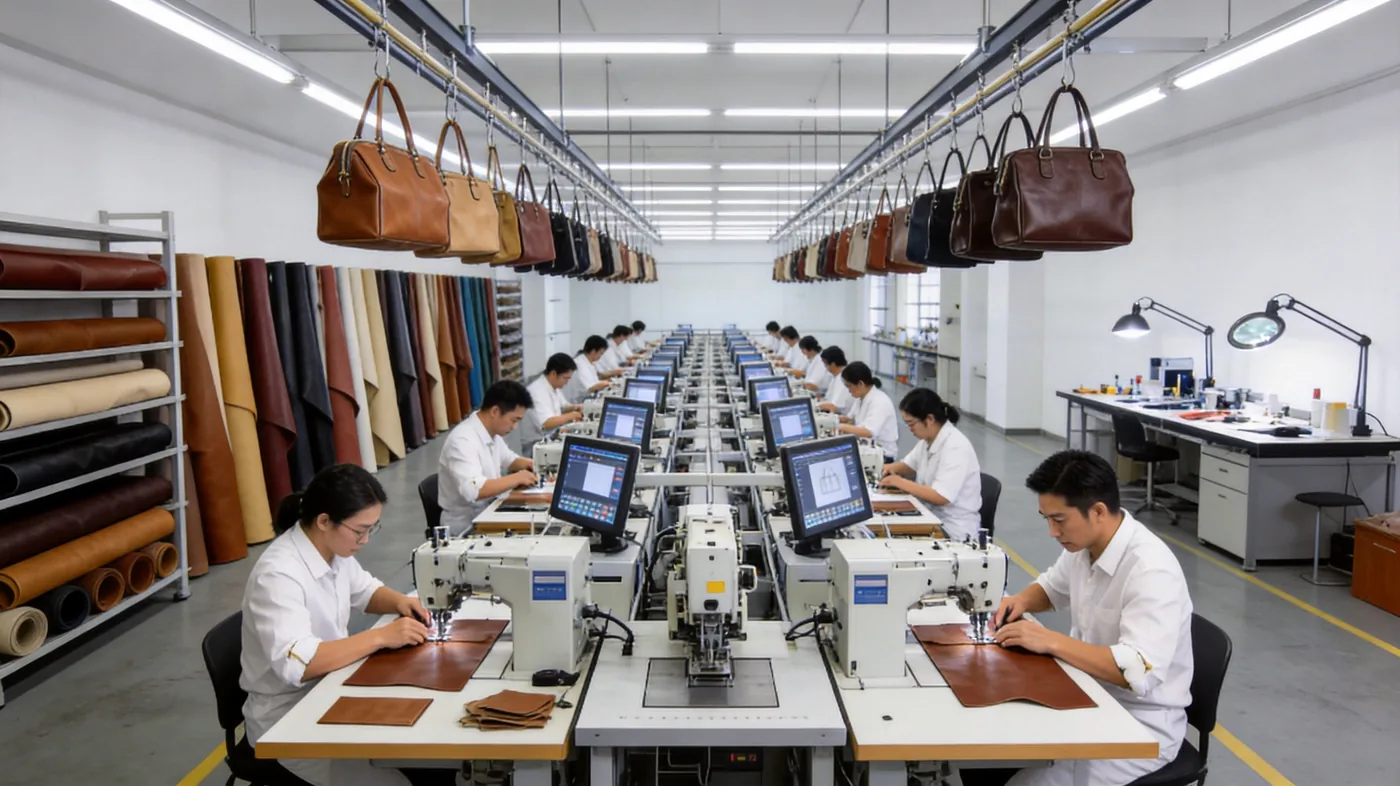
Cutting is where a bag stops being a drawing and starts being material, so the method chosen matters more than most buyers expect. Clicker press cutting uses a steel cutting die and a hydraulic press to stamp identical shapes at speed, while hand cutting uses a knife or blade guided along a pattern, usually on smaller or irregular pieces. For production volumes in the hundreds and above, a press is normally the right tool; for sampling, one-off pieces and those awkward parts a die cannot reach, hand cutting is essential. The strongest cutting plans use both.
This guide explains what happens on the cutting table, what each method costs in money and in material, and how to write a cutting brief that protects your yield. It is written for brand owners and designers who buy finished bags rather than sit at the bench, which is exactly why the cutting plan deserves their attention: it is the single biggest lever on unit cost that is invisible in the finished product.
There is one number to hold onto throughout. On most leather bags, the material can account for a third to a half of the ex-works cost, and cutting is where that material is either used or wasted. A cutting plan that improves yield by a few percentage points can move margin more than a hard negotiation on labour.
Programme parameters at a glance
| Parameter | Commitment |
|---|---|
| Minimum order quantity | 500 pieces per style / colourway |
| Sampling lead time | 6–10 working days (12–15 days for complex constructions) |
| Bulk production lead time | 35–50 days after sample approval |
| Inspection standard | AQL 2.5 (ISO 2859-1), single sampling, general level II |
| Incoterms | FOB Xiamen — EXW, CIF and DDP available on request |
| Payment terms | T/T 30% deposit / 70% before shipment; L/C at sight for container loads |
| Verified production floor space | 4,950 m² (SGS-verified) |
| Team | 137 staff across 7 production lines |
| Equipment | 149 machines including computerised saddle-stitch and edge-painting units |
| Monthly capacity | 200,000 pieces |
| Entity | Founded 2014; principal has worked in bag development since 2004 |
Before comparing methods, it helps to name what the cutting stage actually has to deliver. It is not only shape. A cut panel must match the pattern dimensionally, hold its intended grain direction, avoid visible defects, and present a clean edge that later finishing can work with. Miss any one of those and the fault travels down the line into stitching, finishing and finally the customer's hands.
What Cutting Has to Achieve
A cutting operation has four outputs beyond the obvious one. It must produce panels to dimension within tolerance, orient them to the grain direction the design requires, place them so that natural defects and scars fall outside the visible area, and leave an edge clean enough for the finishing method specified. Getting three of four is common; getting all four consistently is what separates a controlled cutting room from a hurried one.
| Cutting output | Failure if missed | How it is controlled |
|---|---|---|
| Dimensional accuracy | Panels will not align at stitching; seams pull | Cutting die tolerance, pattern allowance, nesting |
| Grain direction | Bag twists, sags or stretches unevenly | Pattern marked with grain; nesting enforces it |
| Defect avoidance | Scars, growth marks or holes visible on finished bag | Grading hides before cutting; marker planning |
| Edge cleanliness | Paint or burnish will not sit flat; edges fray | Blade sharpness, die condition, cut angle |
| Yield efficiency | Higher material cost per bag, thinner margin | Nesting strategy, size grading, panel count |
These outputs interact. Tightening dimensional tolerance by using a die generally improves cleanliness as well, because a die cuts to a consistent shape every time. But a die can only cut shapes it was made for, so the parts it cannot reach must still be cut by hand, and the two methods have to agree at the joins. That is the central tension of the cutting room, and it is resolved by planning, not by preference.
Clicker Press Cutting: How It Works
A clicker press, also called a die-cutting press or beam press, is a hydraulic machine that drives a steel-rule die through the material onto a cutting board. The die is shaped like the panel, formed from a band of steel set into a wooden or composite base. The operator places the die on the hide, positions the material, and activates the press; the die descends and separates the panel in one motion.
The method's advantages follow from that single, repeated motion. Shape repeatability is high because the die does not change, so every front panel is identical, which makes assembly predictable. Speed is high, which holds labour cost down. Edge quality is consistent, because the die angle and the cutting board are controlled variables. And because the die is a fixed shape, the operation needs less skill per cut than hand cutting, so it scales with less risk of operator variation.
- One-time die cost per panel shape, amortised across the run.
- Very consistent shape and edge, run after run.
- High throughput, so low labour cost per panel at volume.
- Less dependent on individual cutting-room skill.
- Efficient for simple, repeated shapes at production scale.
- Requires the die to be made and proven before bulk begins.
The limitations are equally clear. A die costs money to make, so it only pays back above a certain quantity. It cannot cut shapes with undercuts or very tight internal corners without risk of tearing. And it can only cut the shape it was built for, which means any late design change to that panel is expensive, because it may require a new die. For a brand still settling a silhouette, that rigidity is a real cost.
| Press factor | Effect | When it matters most |
|---|---|---|
| Die cost | Fixed charge per shape, amortised | Low volumes and unproven designs |
| Die lead time | Added to the sampling and pre-production window | Tight launch calendars |
| Shape repeatability | Excellent; supports consistent assembly | Multi-panel structured bags |
| Internal corner limits | Very tight or undercut shapes risk tearing | Decorative cut-outs and tight radii |
| Change cost | A revised panel can mean a revised die | Design still in development |
Hand Cutting: How It Works
Hand cutting places a paper or card pattern on the material and traces or cuts around it with a knife, a rotary blade or a head knife, depending on the material and the part. The pattern itself may be re-usable card, a template cut from a stable sheet, or a drawn outline transferred from a marker. The operator's judgement guides the blade, and that judgement is what makes the method both powerful and variable.
Its strengths are flexibility and reach. There is no die to make, so a new shape can be cut the day the pattern is agreed. Complex outlines, tight internal corners, small parts and one-off pieces are all within reach of a skilled hand. Because the operator is reading the hide as they cut, they can route around a scar or a soft area in a way a fixed die cannot, which can actually improve yield on irregular material.
- No die cost, so viable for samples and short runs.
- Handles shapes and cut-outs a die cannot reach.
- Operator can cut around defects, helping yield on irregular hides.
- Fast to change when the pattern is still moving.
- Skill-dependent, so consistency varies between operators.
- Slower per panel, so labour cost rises with volume.
The weakness is consistency and speed. Two operators cutting the same pattern by hand will produce panels that differ slightly, and those differences accumulate at assembly. Hand cutting is also slower, so at high volume it becomes the more expensive method despite having no die cost. The resolution is not to choose between hand and press but to assign each the work it does best.
Yield and Material Behaviour
Leather is not a uniform sheet. It is irregular in shape, variable in thickness and quality across the hide, and sold by area or by hide. That makes yield a live problem on every cut. The neck stretches, the belly is loose, the back is the firmest and most valuable area, and a hide will usually carry some scars or growth marks that have to be avoided on visible panels.
The cutting plan, and specifically the marker, decides how well the design uses that hide. A marker that nests panels tightly around each other and around the hide's irregular outline wins material back; a careless marker throws money away. Panel size and shape drive this directly, which is why a design change made for appearance can have a material cost nobody intended.
| Hide region | Character | Best use |
|---|---|---|
| Back and shoulder | Firm, consistent, fewest defects | Large visible panels, handles, straps |
| Neck | Stretchy, less uniform thickness | Linings, internal pockets, hidden parts |
| Belly | Loose and stretchy | Small internal parts only |
| Butt | Dense and firm | Base panels, load-bearing parts |
| Flank and offcuts | Small, variable | Piping, binding, small fittings |
Two further variables bend yield up or down. Size grading, where a programme cuts several sizes from one marker, can raise efficiency by fitting small panels into gaps left by large ones. And direction, since a design that must have all panels running the same way cannot rotate pieces to fit, whereas a design that tolerates mixed direction nests far more tightly. Specifying which panels must share direction is one of the highest-value lines in a cutting brief.
The material itself sets the ceiling. Two designs using the same leather will not have the same yield, because panel geometry differs. A simple tote cut from four large panels will waste more edge area than a structured bag cut from many smaller ones, but the structured bag pays for the gain in extra seams and labour. That trade-off, between material efficiency and assembly effort, is present in every cutting decision.

Press or Hand: Choosing by Case
The choice is rarely absolute. It depends on volume, panel shape, material behaviour and how settled the design is. The table below is the practical decision frame used when planning a production run: match the case to the method rather than picking a house preference.
| Case | Method | Reason |
|---|---|---|
| Sampling and first prototypes | Hand | Design still moving; no die justified |
| 500+ pieces, simple repeated panels | Press | Die pays back; consistency matters at assembly |
| Small-batch pilot runs | Hand or hybrid | Volume too low to amortise dies |
| Tight internal corners and cut-outs | Hand | Die risks tearing fine geometry |
| Large uniform panels at volume | Press | Shape repeatability and speed |
| Irregular or heavily marked hides | Hand or hybrid | Operator can cut around defects |
| Multiple sizes in one run | Hybrid | Grading gains from press precision on shared parts |
A useful rule of thumb is that the press earns its die cost when a shape is repeated often enough and accurately enough that the die charge is a small fraction of the total material and labour saved. Below that threshold, hand cutting is usually faster to start and cheaper to change. Above it, the press is normally both quicker and more consistent.
Quality Control at the Cutting Table
Cutting quality is checked before panels leave the table, because a fault discovered here costs a panel, while the same fault discovered after stitching costs a bag. The checks are simple and mostly visual, but they must actually happen, at the cutting stage, not be assumed.
- Dimension check against the pattern on a sample of cut panels.
- Grain direction confirmed on every panel that carries a direction requirement.
- Surface graded for scars, growth marks and colour variation within the visible area.
- Edge inspection: clean separation, no ragged or torn margins.
- Pairing check for left and right parts that must mirror each other.
- Panel count reconciled against the pattern before the batch moves on.
Where a run is inspected to AQL 2.5 under ISO 2859-1, single sampling at general level II, cutting-stage faults should be caught long before final inspection. The purpose of cutting-room checking is to stop faults travelling, not to satisfy a final audit. A panel that is a millimetre out will not be fixed by an inspector at the end of the line; it will simply be a defect by then.
Every fault that leaves the cutting table is carried by every operation after it. Cut clean or cut twice.
Specifying a Cutting Plan
A cutting plan belongs in the technical pack alongside the pattern and bill of materials. It does not need to be long, but it needs to settle the decisions that the cutting room would otherwise make on your behalf, because those decisions have cost and quality consequences.
Two commercial points belong in the same conversation. First, die cost is a one-time charge that should be stated separately so it can be amortised honestly across the run and across future reorders. Second, because running a marker well is skilled work, the cutting plan should be agreed with the people who will execute it rather than handed down. A pattern cutter who has seen the hide will often suggest a nesting change that improves yield without touching the design.
It is also worth deciding early how reorders will be cut. A die made for the first run should serve every subsequent run of that panel, which turns a one-time cost into a long-term gain. Programmes that plan for reorders at the cutting stage avoid paying for the same die twice and keep panels consistent across seasons, which matters when a customer compares a bag bought this year with one bought last.
Why Cutting Decides the Rest
Almost every later operation inherits the cutting decision. Stitching only aligns if panels were cut to the same tolerance. Edge finishing only looks clean if the cut edge was clean. Yield only holds if the marker used the hide well. The cutting room is upstream of everything, which is why a small investment in getting the plan right returns more than the same effort spent anywhere downstream.
| Downstream stage | What it inherits from cutting | Cost of a poor cut |
|---|---|---|
| Skiving and folding | Panel edges that thin and fold predictably | Rework, wasted panels, uneven folds |
| Stitching and assembly | Panels that match at every join | Misaligned seams, pull, rework |
| Edge finishing | Clean, straight edges to paint or burnish | Rough finish, rejected units |
| Hardware setting | Accurate placement points and panel thickness | Misplaced fittings, weak settings |
| Final inspection | Panels within tolerance before assembly | Higher defect rate, failed AQL |
For a brand owner, the practical conclusion is that the cutting brief is a commercial document, not a technical footnote. It governs material cost, consistency and the risk of rework. The programme team can translate a design into a panel-by-panel cutting plan, run the numbers on die cost against volume, and set the marker rules that protect yield, so that the first cut is also a considered one.
Plan your cutting properly
Send your pattern and anticipated volumes. The programme team will advise on press versus hand cutting, die economics and marker rules that protect yield before the first hide is cut.
Frequently Asked Questions
What is the difference between clicker press cutting and hand cutting?
Clicker press cutting uses a steel-rule die and a hydraulic press to stamp identical panel shapes, giving high consistency and speed once a die is made. Hand cutting uses a knife or blade guided along a pattern, which needs no die and reaches complex shapes but depends on operator skill and is slower per panel.
Which method is better for bags, press or hand cutting?
Neither wins outright. For repeated panels at volumes of roughly 500 pieces and above, a press usually wins on consistency, speed and edge quality. For sampling, one-off pieces, and tight or irregular shapes a die cannot cut, hand cutting is essential. Most programmes combine both.
When does a cutting die become worth the cost?
A die pays back when its one-time cost is small against the material and labour it saves across the run. As a rough guide, above several hundred identical pieces per shape the die charge is easily amortised; below that, hand cutting is usually faster to start and cheaper to change.
How does grain direction affect cutting?
Leather stretches more in one direction than another. If panels are cut without regard to grain, the bag can twist or sag unevenly under load. The cutting brief should state which panels must share direction, which also constrains how tightly the marker can nest panels and therefore affects yield.
What is a marker in bag cutting?
A marker is the plan showing where each panel is placed across the hide or material. It determines how much of the hide becomes product and how much becomes waste. A well-drawn marker nests panels tightly around defects and the hide's irregular outline, which raises yield without changing the design.
Why does cutting yield matter so much to cost?
On many leather bags the material is a third to half of the ex-works cost, and leather is irregular and sold by area. A cutting plan that lifts yield by a few percentage points can therefore move margin more than a hard negotiation on labour, which is why the marker and panel geometry matter commercially.
Can a design change after the dies are made?
Yes, but it is expensive. A revised panel shape usually needs a revised die, which adds cost and lead time. This is why designs should be settled at the sampling stage before dies are ordered, and why a brand still changing its silhouette may be better served by hand cutting until the pattern stabilises.
What causes ragged or torn edges on a cut panel?
Common causes are a blunt or damaged die, an incorrect cutting board, too little press pressure, or a tight internal corner that the die cannot cut cleanly. Hand cutting can produce a similar result from a dull blade or an unsteady angle. Edge quality matters because later painting and burnishing cannot hide a poor cut.
How are cutting defects controlled in production?
Cutting is checked at the table before panels move on: dimensions against the pattern, grain direction, surface grading for scars and marks, edge cleanliness, and left-right pairing. Catching a fault here costs a panel, whereas catching it after stitching costs a finished bag, so cutting-stage checks are cheaper and more effective.
Does cutting method affect the minimum order quantity?
It can. A press programme carries die cost that is easiest to justify at volume, so hand or hybrid cutting suits small-batch pilot runs. The standard programme minimum is 500 pieces per style and colourway, with small-batch pilots available where a brand is still testing demand.
What information belongs in a cutting brief?
A cutting brief should state the method for each panel, which shapes justify a die and who pays for it, grain direction requirements, dimensional tolerance in millimetres, defect grading rules for visible and hidden areas, and marker nesting instructions including any size grading across the run.
How is leather quality handled during cutting?
Hides are graded before cutting, and the marker places large visible panels on the firmest, most consistent areas such as the back and shoulder, while linings and hidden parts use the neck and belly. A skilled hand cutter can route around remaining defects, which is one reason hand cutting can help yield on heavily marked hides.
Does the cutting plan change for a structured bag versus a tote?
Yes. A structured bag with many smaller panels can nest more tightly and waste less edge area than a tote cut from a few large panels, but it pays for that in extra seams and labour. The cutting plan balances material efficiency against assembly effort for the specific silhouette.
What tolerance should be set on cut panels?
Tolerance depends on the construction and the material. Tight tolerances are easier to hold with a press than by hand, which is one argument for pressing critical panels. Whatever is set should be realistic for the method chosen, because an unachievable tolerance simply creates inspection failures without improving the bag.
How long does it take to cut a bulk order?
Cutting is one stage within bulk production, which typically runs 35 to 50 days after sample approval. If new dies are required, their making and proving adds to the pre-production window. Sampling itself normally takes six to ten working days, or twelve to fifteen for complex constructions.
Can offcuts from cutting be used in the same bag?
Yes, and it is worth planning. Smaller offcuts suit piping, binding, small tabs and internal fittings, and using them reduces waste. Specifying where offcuts may be used keeps the visible panels consistent while giving the cutting room a legitimate outlet for smaller pieces.
Why do two bags made from the same hide look slightly different?
Leather varies in colour, grain and texture across a single hide as well as between hides. Even with careful nesting, panels cut from different areas will differ subtly. Grading and marker planning reduce the effect, and for premium work the brief may specify which hide regions may appear on the most visible panels.
Does press cutting damage the leather?
Not when the die, board and pressure are correct. Problems arise from blunt dies, worn boards or excessive pressure, which can bruise the material or leave a ragged edge. A proven die and a maintained cutting board keep press-cut edges clean enough for later painting or burnishing.
How do I reduce cutting waste without changing my design?
The main levers are marker nesting, size grading, and reviewing which panels may rotate relative to the grain. Cutting several sizes from one marker lets small panels fill the gaps around large ones. These changes raise yield with no effect on the finished silhouette, so they are usually the first place to look.
What happens to panels that fail cutting quality checks?
Panels with dimensional, grain, surface or edge faults are pulled before assembly. Depending on the fault, a small panel may be recut from an offcut, but visible panels with defects are normally rejected outright. Reconciling panel counts against the pattern before a batch moves on prevents under- or over-cutting.